As the saying goes, you only get one chance to make a first impression. This truism holds for pottery and it is therefore important to me that my photos of my pottery are as strong as they can be. I read with interest Jeff Campana’s comprehensive post about how he creates digital images of his amazing pots. One of the main take-away messages? Get a light box!
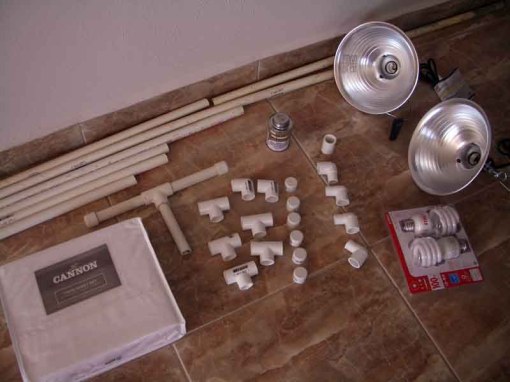
After dead-ends on the online purchase front with the cheaper light boxes (around $40), we decided to build our own light box for photographing my work. I found a LOT of information online about DIY light boxes but was sold once I came across one that involved using PVC. We have a lot of pipes hanging around, leftovers from construction, and Nick LOVES to build stuff from PVC. A trip to Home Depot (and Kmart) and we had all our parts:
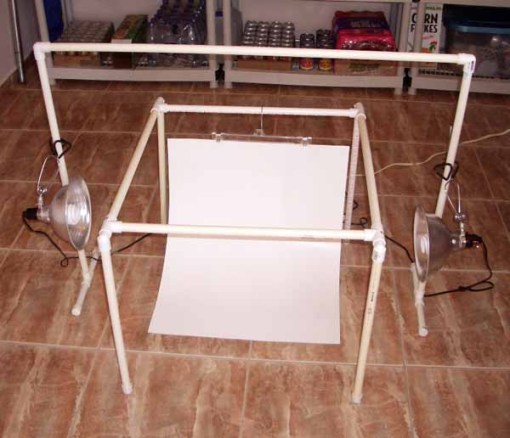
For less than $10, we had the makings of my light box AND the makings of a frame for mounting the lamps (missing from the photo is the white sheet of poster board we purchased at Kmart and a hanger we used to attach it to the frame). The light fixtures and bulbs were the big expense (and we would have had to have purchsed them regardless), coming in at about $20. Here is the frame of the box and the frame for mounting the lights:
Lights off…
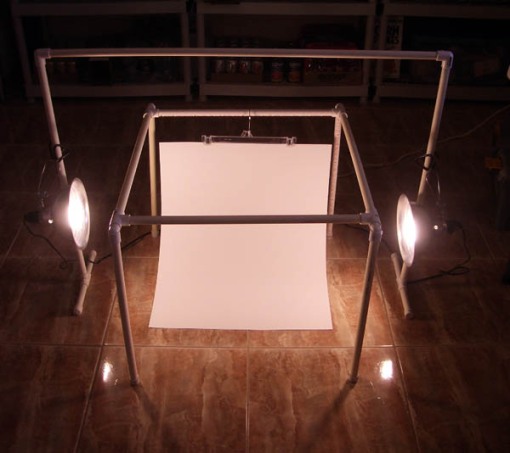
Lights on!
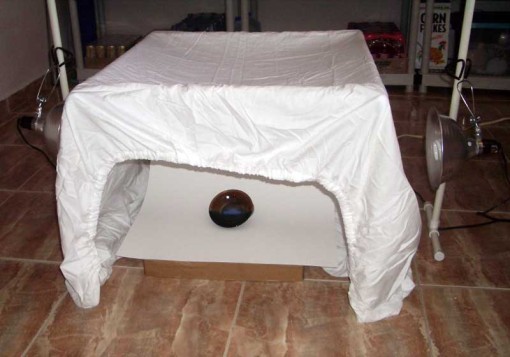
For diffusing the light, we used a fitted twin sized white sheet. Here is the final set-up:
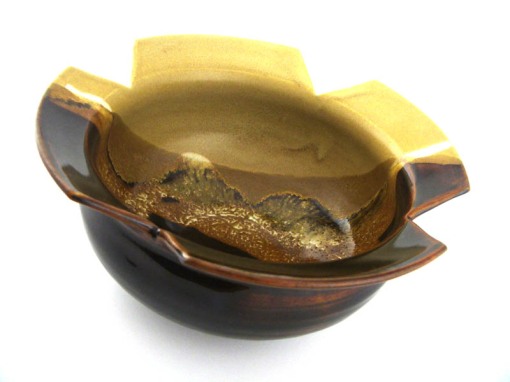
Classy, huh?? 🙂 Well, regardless of how it may look, the setup does seem to do the job. As Jeff suggested, it seems that the most important thing is getting the light right. We’re still messing around with light angles and distance from the box to get the best photos. Since none of the joints are glued we can easily expand the setup. For example, we have another longer 1/2inch pipe for the external light frame so we can set the lights further away from the frame. I tested the box out with a bowl I made in the UK that has been quite a pain to photograph (lots of shiny reflective surfaces):
Not a bad start, huh? 🙂
Jul 5, 2009 at 9:51 am
OMG!!!!!!!!!!!!!!!!!!!!!!!!!!!!!!!! Tres clever!
Jul 5, 2009 at 9:52 am
Bowl= c’est bootiful!
Jul 5, 2009 at 10:51 am
Thanks!