After 6 great years in PR, we’ve decided to move back to the US mainland.

Therefore our house/pottery studio/gallery is for sale. If you’ve always wanted to enjoy living a relaxed lifestyle in scenic, green countryside less than a 10 minute drive from beautiful Caribbean beaches then this could be property for you!

Please visit the following page for more details…

http://www.rinconpottery.com/forsale


For Sale

House for Sale!

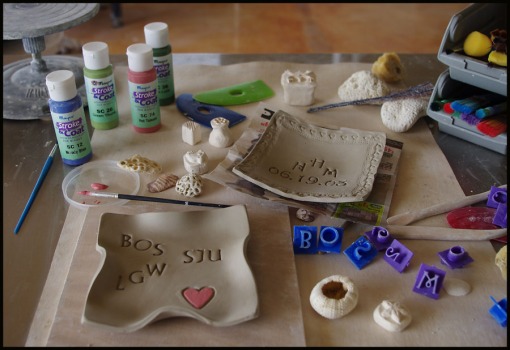
Have fun with friends and family and create special gifts for the holidays or for a special occasion. Rincón Pottery is now offering one hour sessions for you to make your very own plates full of memories, or “MemoPlates” as we like to call them!

During these sessions, you will be supplied with everything you need to make these completely functional 5 inch square hand-built plates. Using stamps, shells, corals and colored underglazes you will be able to decorate them and create your own unique masterpieces. This experience is suitable for all ages (children under 16 must be accompanied by an adult).

Make a MemoPlate…
• As a unique gift for the grandparents this holiday season
• To mark the arrival of a new baby (e.g. baby hand prints)
• To commemorate a special occasion (e.g. birthday, anniversary or honeymoon)
• For use during a special event (e.g. a ring plate for your wedding)
• Just to have fun!

Book a session for yourself or bring a group of friends. The cost is $25 per plate, with a minimum of $50 (i.e. 2 plates) per 1 hour session. This includes all materials, glazes and firings. Shipping, if needed, is not included (around $10 per shipping address).
Clay takes time to dry and fire, so plates are usually ready 4 weeks after the date of the workshop.

Call or email us for more info, or to make a booking.
Visit our website for contact information.

Click here to read a recent customer review of a MemoPlate experience:

Click here to see photos of Hands on Clay experiences at Rincón Pottery

Our Etsy shop is now up. Whether it is for a birthday, holiday or wedding (or simply to treat yourself), beautiful and unique gifts from Rincón Pottery are only a click away!

Miri has listed a wide selection of her work, including mugs, rum cups, bowls, plates and necklaces and new items will continue to be added over the coming days and weeks.

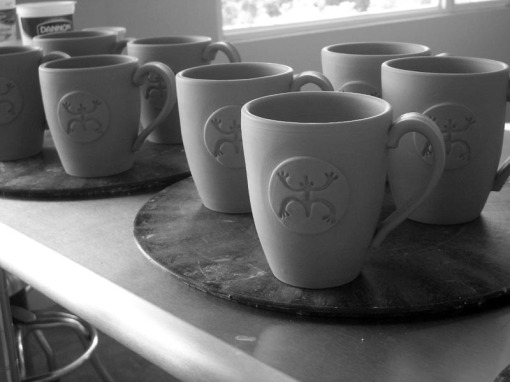
Several items feature the famous Taino Indian Coqui (tree frog) image and others are textured using shells and pieces of coral found on the beaches of western Puerto Rico. Continuing the Puerto Rican (especially Rincón) theme there are also “shaka” (hang loose) stamped pieces for the surfer in your family.

Why delay? Come shopping today by clicking here!

Are you looking for fun, artistic and creative things to do in Rincon, Puerto Rico, that don’t rely on the sun shining?

If so, then look no further; Rincon Pottery is the answer. We offer ‘Hands on Clay’ workshops (either 1 or 2.5 hours) that give you a chance to get your hands dirty with clay. Never worked with clay before? No problem, beginners are welcome! The lessons include an introduction to working with clay and the various techniques that you will try your hand at. Experience both hand building and wheel throwing – make a masterpiece! In the longer workshop you are able to paint and decorate your pottery creations with colored under-glazes. Workshops are available either as private sessions or for small groups (max. 4 people)

We also have a ceramics “art gallery” with a wide range of work on display and for sale. From small Taino inspired souvenirs (coqui, sol de jayuya etc.) to large bowls, the gift shop has something to suit every taste and price range.
It is an ideal place to stock up on hand-crafted gifts for loved ones back home (shipping available) or simply to pick up a hand-made memento of your vacation. The essence of Rincon Pottery is “functional art” and once you see it, you will understand why!

Our studio and gallery is located in the green hills of Cruces, Rincon and is easily accessible from the surrounding towns of Mayaguez, Atalaya, Aguada, Aguadilla and Isabela.

For more information please visit our website www.rinconpottery.com and if you have any questions, please don’t hesitate to contact us.

Our blog survived for 3.5 years but for now, we’re all blogged out. Those of you who are into pottery are invited to join me on my Rincón Pottery facebook page (click to check it out), where the updates are frequent. If the muse strikes again, we will be back. In the meantime, so long and thanks for all the fish!


Sunset in Cruces (Photo by Nick)

Our two prickly pear cacti in the front planter had been dormant for a while, but just recently they have both exploded with new growth!

Crazi Cacti

I can see cactus quesadillas in our near future… yum yum! 🙂

Truth be told, I was a bad pottery student…  Ok, a bit of context.  I started taking “continuing education” pottery classes while I was in graduate school and needed to do something non-academic (my degree program was in Psychology).  Once I got on the wheel, I was hooked.  I was a dedicated and motivated student, but definitely not disciplined.    When I was in the studio, I wanted to make stuff.  Let me rephrase.  I wanted to make stuff I wanted to make.  Not teapots, not 10 canisters that all looked the same.  Plenty of assignments were to be had at my “real” school.  Pottery was about diversion, creativity and MAKING STUFF.  Exercises?  Not so much.

Over the next decade and a half (yikes), I continued dabbling in pottery if and when I could.  I moved around a good deal (Minnesota, Chicago, Boston, South East England) but always found a local studio where I could take independent study classes when work schedules permitted.  Again, the emphasis for me was on “independent”.  Every once and a while, I’d get the zealot instructor who was determined to “teach” me something or  “loosen up” my throwing (I like my pots tight, thank you very much!) and so would engage me in some exercise involving repetitive throwing.  Mostly, they left me alone.

These days, I finally have my own studio.  Pottery is no longer just a diversion and a side hobby for me.  It has become my vocation.  During the past year of working full time in the studio for the first time since I took up pottery, my throwing has definitely evolved, as has my willingness to (gasp) apply some discipline to my work on the wheel.  My inspiration for exercises often comes from pottery blogs I follow.  Granted, I don’t always do the assignments on time (it took me a few weeks, if not months, to complete Michael Klein’s “12 by 12” exercise) nor do I always follow them to the ‘T’…  But, as I continue to develop my glazes and thinking about pot surfaces, I find that some exercises DO indeed provide well needed structure for pushing my throwing and my surface finishing forward in exciting new ways. So I keep them in my mental arsenal, and do them when it feels right.

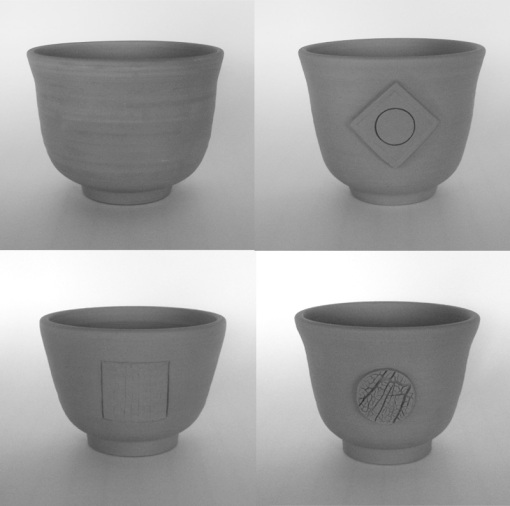
Recently, partially thanks to a beautifully  squishy (technical term) batch of clay, I decided to sit down for an extended throwing session to throw a bunch of smaller forms.  Not needing any more mugs, I was planning on making some small bowls and perhaps some tumblers.  Loosly inspired by a “recent” (re March…) assignment posted by Emily Murphy on exploring form, I decided to do my own take on her assignment, using a new form for me, the yunomi (tea bowl).

A yunomi is a Japanese form of teacup used for daily (informal) tea drinking, typically made from a ceramic material, being taller than wide, with a trimmed foot. Because of their “contained” but well defined size and function, yunomis are a great form for experimentation in shape and decoration. For a sense of how varied yunomis can be, check out this awesome online yunomi show at AKAR Design.

So here’s what I came up with (I actually made 14 but 2 were very similar to those depicted and I was going for an Emily inspired 2×2 layout). I find it very exciting to have a very good idea even at the greenware stage what glaze treatment these guys will be getting to highlight their form and/or texture. Should be fun to see how these end up! I probably didn’t push my forms as much as Emily would have liked (and some of these forms might actually be more “chawan” than “yunomi”, for those of you who are strict with your Japanese teaware definitions…), but hey, baby steps, right? 😉

Set 1

Set 2
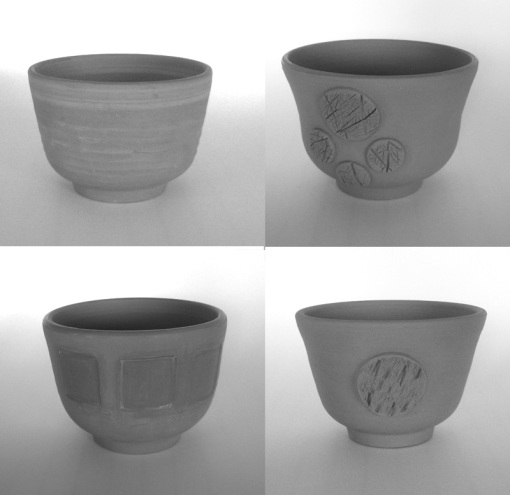
Set 3

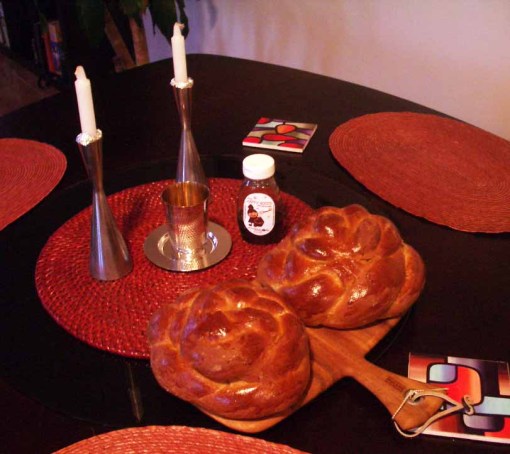
Tonight we are celebrating the Jewish New Year with home made challah and honey from our local farmer’s market. Here’s wishing peace, love and happiness to everyone of all religions, faiths or lack thereof .

Nick and Miri

Hurricane Earl is about 189 miles away from us, hopefully continuing its West Northwest path up and away.  Nick and I are safe and sound in the house, all loose objects are contained, we have plenty of supplies including extra gas for the generator and a chilled bottle of Don Q Coco!

Apparently, the east coast of Puerto Rico is getting battered.  I read that our governor is cited as saying that the cutoff point for the hurricane strength winds is  Arecibo on the north coast (which is about 47 miles north east of us) and Ponce in the south.  Glad to hear it!  Here on the western coast of the island,  the wind gusts come and go in waves, as does the rain.  Honestly, so far this storm doesn’t seem much different from a heavy rainy season storm.  The jitters are there though, as I KNOW its resulting from bands of an approaching Cat 3 Hurricane…

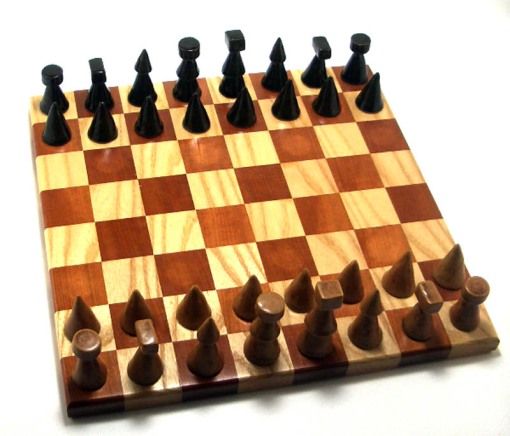
Our power went out about an 1 1/2 hours ago when the rains started, just as I was in the midst of photographing pots and tests  from my latest glaze firing.   I’m very pleased with how my chess set turned out and can’t wait to challenge Nick to a game.  This photo of the set will have to do for now.  I’m sure you’ll forgive me!

Chess Set (Licorice Black and Raw Sienna). Chess board handmade by Lee Chesson

They say necessity is the mother of invention.  Indeed.  In glazing for my next firing, I came across two challenges.  First, I had my chess set to glaze.

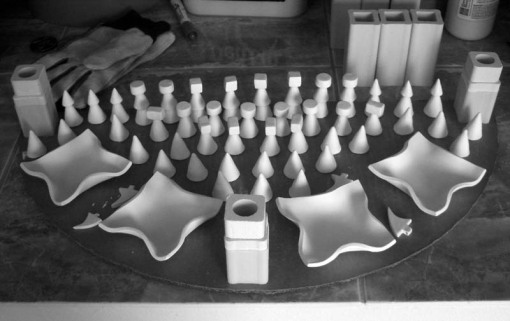
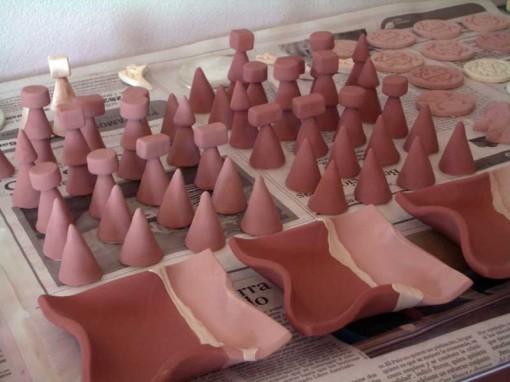
Here they are, all 46 pieces nicely lined up on my mock-up kiln shelf.  We decided to glaze them with my most reliable AND favorite glazes (Licorice Black vs. Raw Sienna).  But how was I going to neatly dip them in the glaze?  My goal was to acheive even coverage (so no half/half dipping and no finger marks).  A challenge, no?

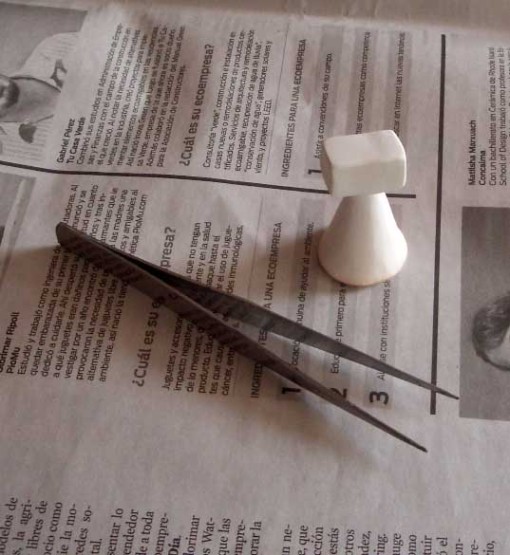
“Random stuff kicking around the studio” to the rescue!  I appropriated these tweezers for use in my studio ions ago and thought I’d use them as makeshift glazing ‘tongs’

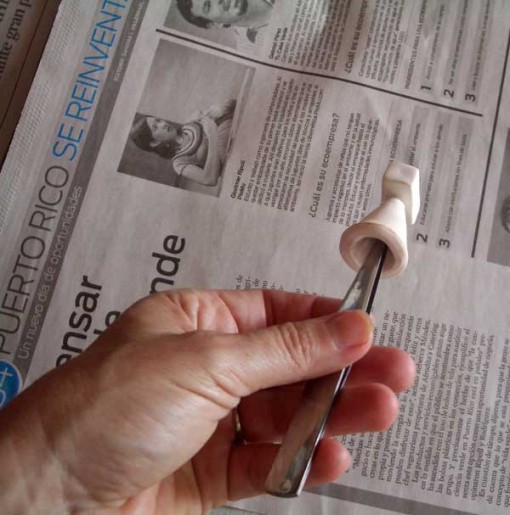
However, rather than using them to grasp the pieces, I stuck the tweezers INSIDE each piece.  The  resulting tension meant the tweezer held on to the pieces nice and tightly, which allowed me to dip the piece upside down into the glaze.

All in all, the system worked quite well, with only two ‘jumpers’ (both operator error really…) which I washed off and will reglaze today.

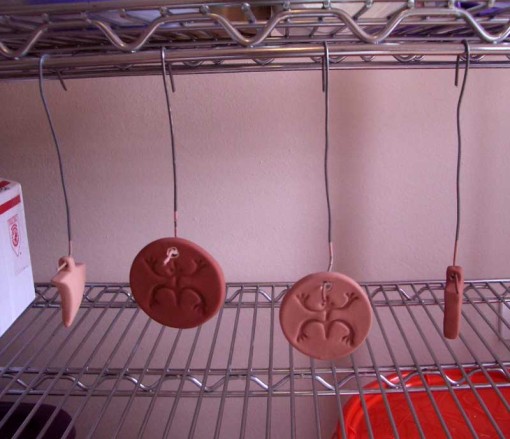
The second glaze challenge had to do with a new ‘toy’ I recently acquired.  Nick was inquiring whether some of the small  items I make  (such as pendants or key-chains) could be glazed on both sides.  Well, yes, but that require a ‘bead stand’ (the items are strung on heat-resistant metal rods and suspended on the stand so they don’t touch the kiln shelves).  We decided this might be a nice addition to our growing arsenal of tools.  So how DOES one glaze items that get glaze on all surfaces? I have no idea how folks glaze beads and the like as I’ve never worked around anyone who does (and would be curious to hear!).

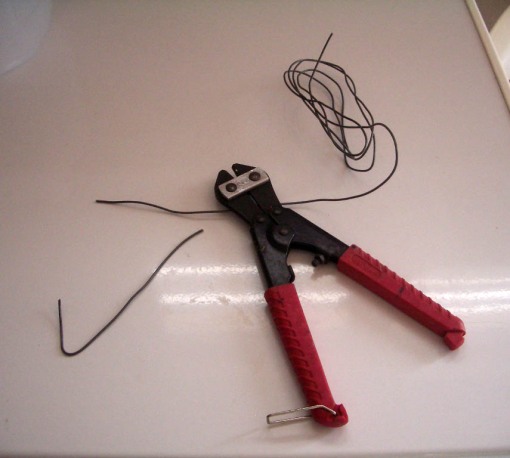
Well my solution was to cut up some strong wire…

and create ‘dip and hang’  wire glazing devices.  Worked like a charm!  🙂  If this firing goes as well as all my new glazing adventures, I’ll be one happy camper!

This weekend we celebrated our 3 year anniversary here in PR.  It is a bit strange thinking back to that very long day (our travel time from the UK, with layovers, was 28 hours…), how I felt back then (fairly overwhelmed…and then I stepped on a fire-ant nest….) and how much we have accomplished over the past 3 years.

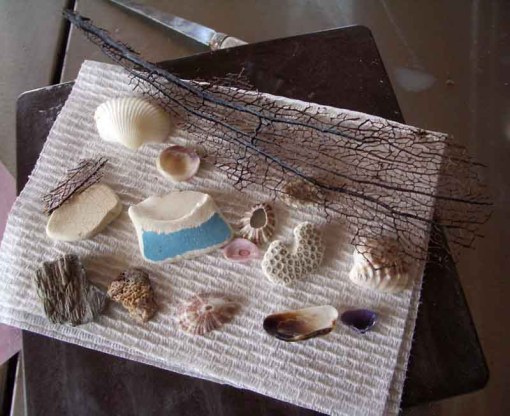
We commemorated the day with some beach time, where I happily partook in some beach-combing.  Typical potter, I was after textures rather than just the “pretty factor”.

I DID also pick up a pottery shard (note the partial foot ring), which has been worn smooth by the sea.  I wonder where this pot started off and how long IT has been traveling????

While Nick enjoyed some downtime (i.e., football viewing) before we went out for dinner, I tried out my new textural finds.   I have some  keepers here, don’t you think?

The weekend was nicely punctuated by a neighbor’s invite to join a party on his Finca (farm) across the road from us.  Though he speaks no English, we’ve been “chatting” off and on over the past 3 years, waving ‘hello’ and sharing with him our progress on the construction front.  At the party (his sister’s birthday) we got a chance to practice our Spanish, lose (badly) at dominoes, eat some great home-cooked food and partake in a drink or two (including sugar-cane moonshine).   All in all, a great weekend that brought home the reasons we chose to move to this friendly and beautiful island.

Tuesday I fired my (tightly loaded) bisque kiln.  Thankfully, despite a strong thunder-storm, the power stayed on (as Nick said, I must have done SOMETHING good…”).  Yesterday, as I was planning to head down to the studio for an afternoon session, the power went out (and was out until a bit before 8 pm).  This lead to a bit of a schedule change…

Things you CANNOT do in a pottery studio without power:

  • Trim pots
  • Throw some more pots

Things you CAN do in a pottery studio without power:

  • Recycle and wedge clay
  • Clean (oh joy!)
  • Organize bisque-ware for 2 glaze firings

Chess pieces and test plates all mocked up for glaze firing

I’ve taken ALL my green-ware down to the kiln room and am getting excited about firing next week (fingers crossed for no power-outage longer than 30 minutes…).   I’ve got lots of test tiles going into this firing, as I’ve mixed up a bunch of new test glazes for my next glaze firing.

Though the traditional vertical test-tiles are great for basic information they can be somewhat limiting, especially as I’m often going after horizontal glaze effects.   Also, I do A LOT of testing, which translates into way too many containers of tiles that are pretty much good for nothing.  So, I’m now using a wider range of surfaces, to better test how my glazes behave (over textures, on flat surfaces when overlapped, with slips/oxides).

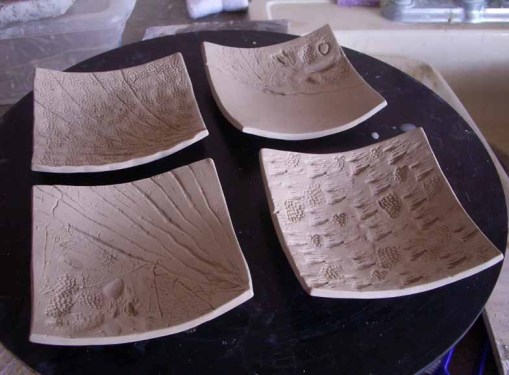
I try to keep the forms small enough to allow dipping in typical  test-glaze quantities (200 grams for me) but large enough to be “functional”.   Perhaps most importantly,  the forms should be quick and easy to produce.   Though my favorite form for testing is a small square plate (textured or not, depending on what I’m testing),  I’m also making petroglyph magnets and key-chains  which are easy to keep nice and small.    I’ve also made some molds out of local shells which are nicely textured and are excellent test items (and make pretty magnets too!).  Even if the items end up on the “seconds” or even “freebie” shelf, they have a better chance of  serving a functional purpose other than landfill…

What you’re favorite shape/form for testing new glazes?

Test “Tiles:  Plates (with or without stamps), shell and petroglyph ‘magnets’.  Some have colored slip recessed in the patterns.  And yes, gotta have the traditional test tiles too (but just one per glaze)…

My latest “secret weapon’ in our quest for ‘proper’ Indian curries (ok, proper UK Curry house Indian curries) is a book aptly named “The Curry Secret” by Kris Dhillon. Nick was sold on the “secret” the minute he heard that the book recipes help re-create what you get in a UK Indian restaurant, rather than attempting to make authentic Indian food as they eat it in India. 😉

The basic premise behind the book is that most curry houses use one base sauce. This sauce is prepared in massive quantities, and is then added to specific vegetables, meat and other spices to create specific dishes. The recipe to this “secret” sauce is the backbone of Dhillon’s book. Click here for a lower fat version of the base sauce…use vegetable oil and add another 4 TBS of it for the original version.

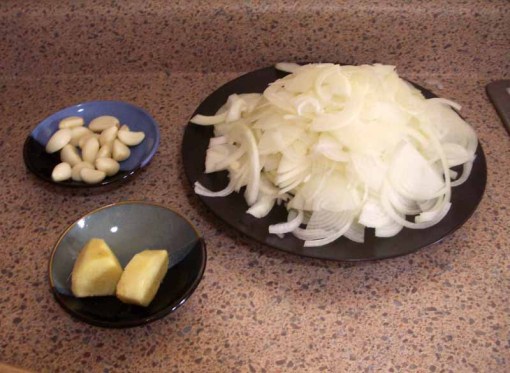
In case you were wondering, this is what 2 LBs of sliced onions (on a dinner plate, sliced using a mandolin), 2 oz of ginger and 2 oz of garlic (the main ingredients of the ‘Secret’ base sauce) look like:

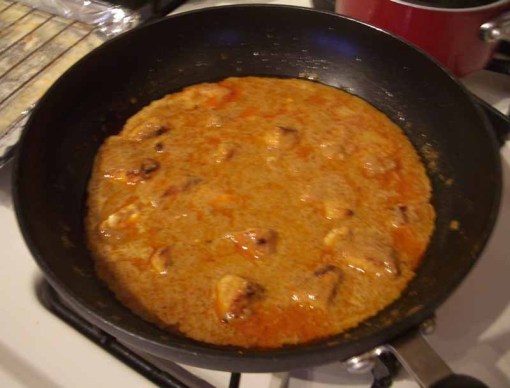
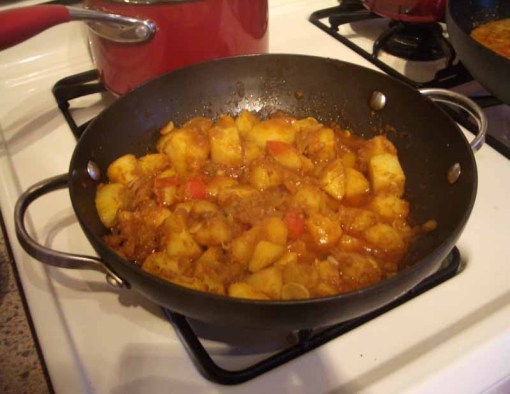
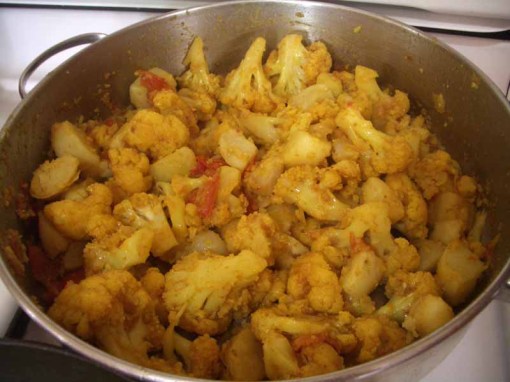
Though making the base sauce is a bit time consuming, you can freeze leftovers, which I did in pre-measured portions. So far, I’ve made 4 dishes using my first base (and have 2 more cups worth of sauce in the freezer):

Chicken Tikka Masala: It was very tasty, and deemed the “closest I’ve come to a REAL CTM” by Nick. It was even better the next day, when I doctored it with a bit of sugar and some ground fresh coconut.


Bombay Aloo : Excellent…

‘Aloo Gobi”: I went a bit heavy on the cauliflower I think but it was still mighty tasty. I added a tomato to this recipe.

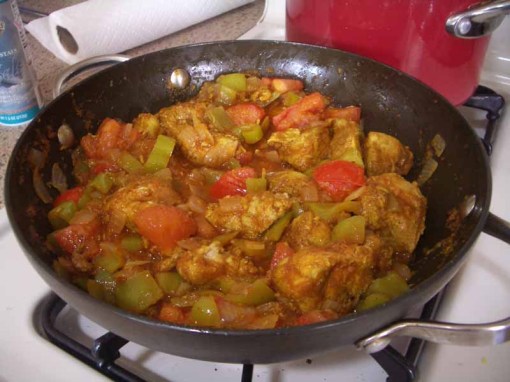
Chicken Jalfrezi : Flavorful, tasty and the most photogenic of the bunch! 🙂

And our verdict? If you are into UK style curries, this IS the book for you (and no, we’re not getting paid to say this) as the recipes make some nice, solid curries. It has definitely enhanced our home-cooked curry repertoire, though we’ve still not given up on trying to convince a nice Indian family to move to Rincón and start up a proper curry house…

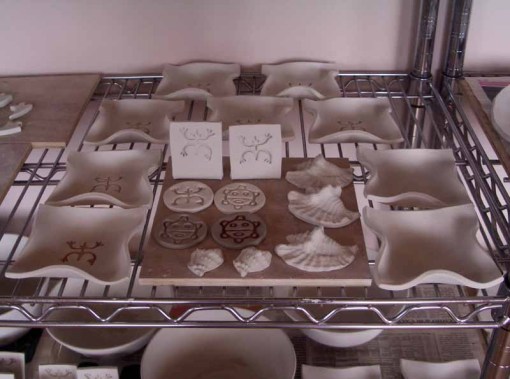
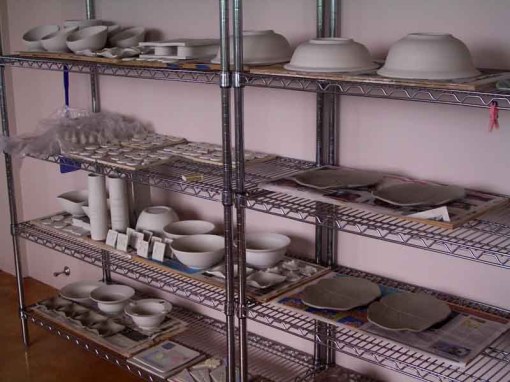
My ware shelves in the studio are finally brimming with sufficient pots for a bisque firing and what a motley crew they are. I’ve got a bunch of experimental new shapes (bowls and vases), lots of small hand built items (from my first few weeks of recovery),  a few carved bowls, numerous underglaze (stroke and coat) color samples for my workshops and yes, the obligatory large bowls, playera plates and 10 mugs… My next glaze firing will include 5 more glazes tests (4 blues and 1 green, all based on the High Calcium Semimatte Base II). So, I’ve got plenty of horizontal and vertical test tiles/plates to fully take them through their paces. I DO love glaze testing! 🙂

This is the longest I’ve gone without firing since we finished setting up my studio last May. Though I’m excited to get back into a regular schedule of firings, I am also a bit anxious. Our low voltage issues have intensified now that we are in the dead of summer. In the past, I was in the habit of firing overnight, to reduce the potential impact on our neighbors’ electrical supply. However, the last two firings I did took longer than the previous ones had. We think this is because our voltage levels have been dropping dramatically in the evenings into the nights (especially on weekends, which is when I fired my last two firings). With the help of Nick’s careful charting of voltage levels, we will figure out the optimum time to fire (multimeters are a wonderful thing!). Someday soon I hope these damn electrical issues will be behind us! 😦

New batch of ‘Coqui’ mugs

The motley crew!